Logical Ports Creation
Requirements
- Connection to the Controller through the Management Port (RJ45 cable)
- IP Address for the Logical Port
- Subnet Mask for the Logical Port
- Role for the port given by client (Management / Service / Replication / ...)
- Data Protocol for the port given by the client (NFS / CIFS / iSCSI / ...)
- Port type for the port given by the client
- Home Port for the port given by the client (Interface Module Ports)
- (Optional) Gateway for the port given by the client
Switch Access Through Ethernet
Tasks
- Enter the Device Manager (https://192.168.128.101 or the IP of the port)
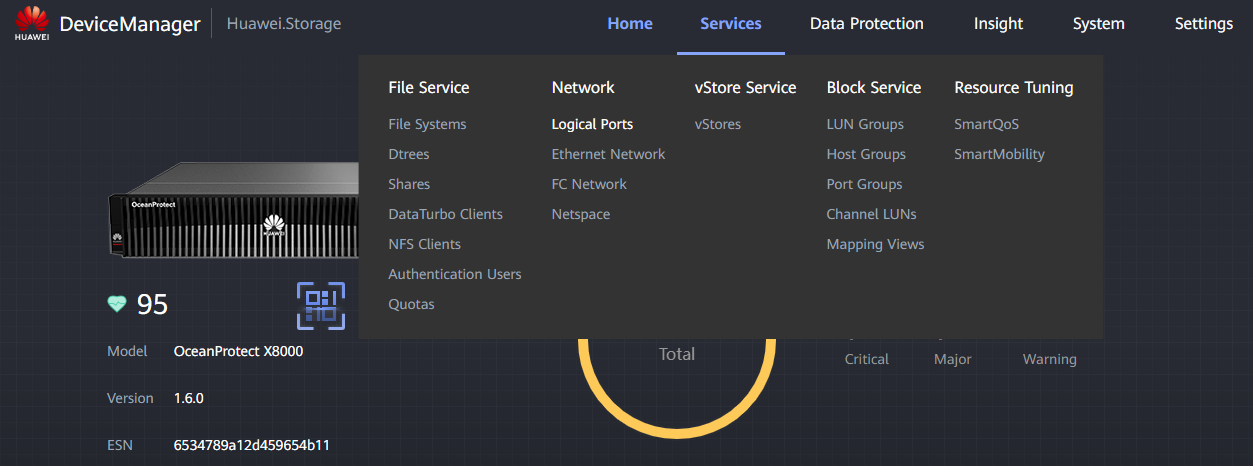
- Go to Services > Network > Logical Ports
-
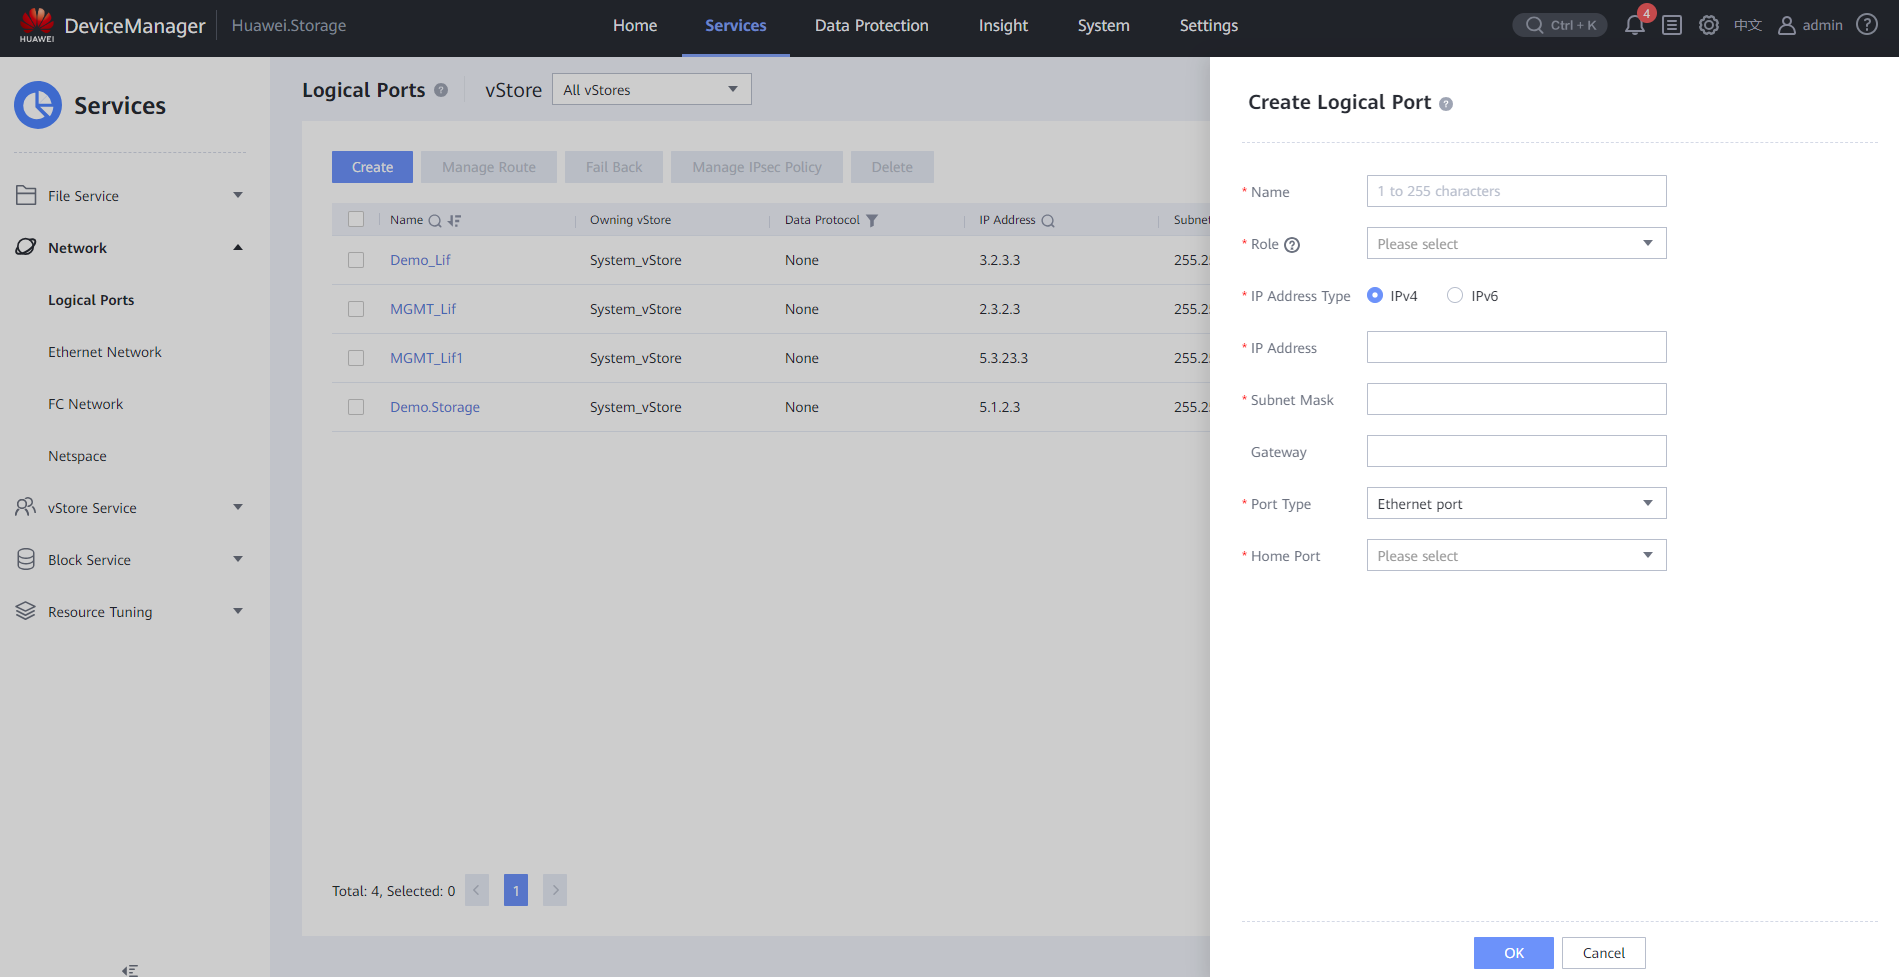
Click Create and fill the data:
-
Name : Descriptive name for the port (e.g. LP_DEV001)
- Role : Given by the client (commonly Service )
- Data Protocol : Given by the client (commonly NFS )
- Owning vStore : Select the vStore created previously for the client
- IP Address Type : Either IPv4 or IPv6 (commonly IPv4 )
- IP Address : Given by the client (IP needed for service)
- Subnet Mask : Given by the client (commonly 255.255.255.0)
- Gateway : Given by the client
- Port Type : Given by the client: Ethernet port
- Home Port : Interface Module Port given by client
- Activation Status : Commonly left as Activated
- Click OK to create the Logical Port
Switch Access Through VLAN
- Enter the Device Manager (https://192.168.128.101 or the IP of the port)
- Go to Services > Network > Ethernet Network
- Make sure that the ports you want to use show as " Link up "
-
Click " Bond Ports " and " Create " to fill the information:
-
Name : Descriptive name for the Bond Port
- Controller : Select the Controller that has the physical ports
- Netspace : Leave as is
- Available Ports : Select the Physical Ports that will form the bond port
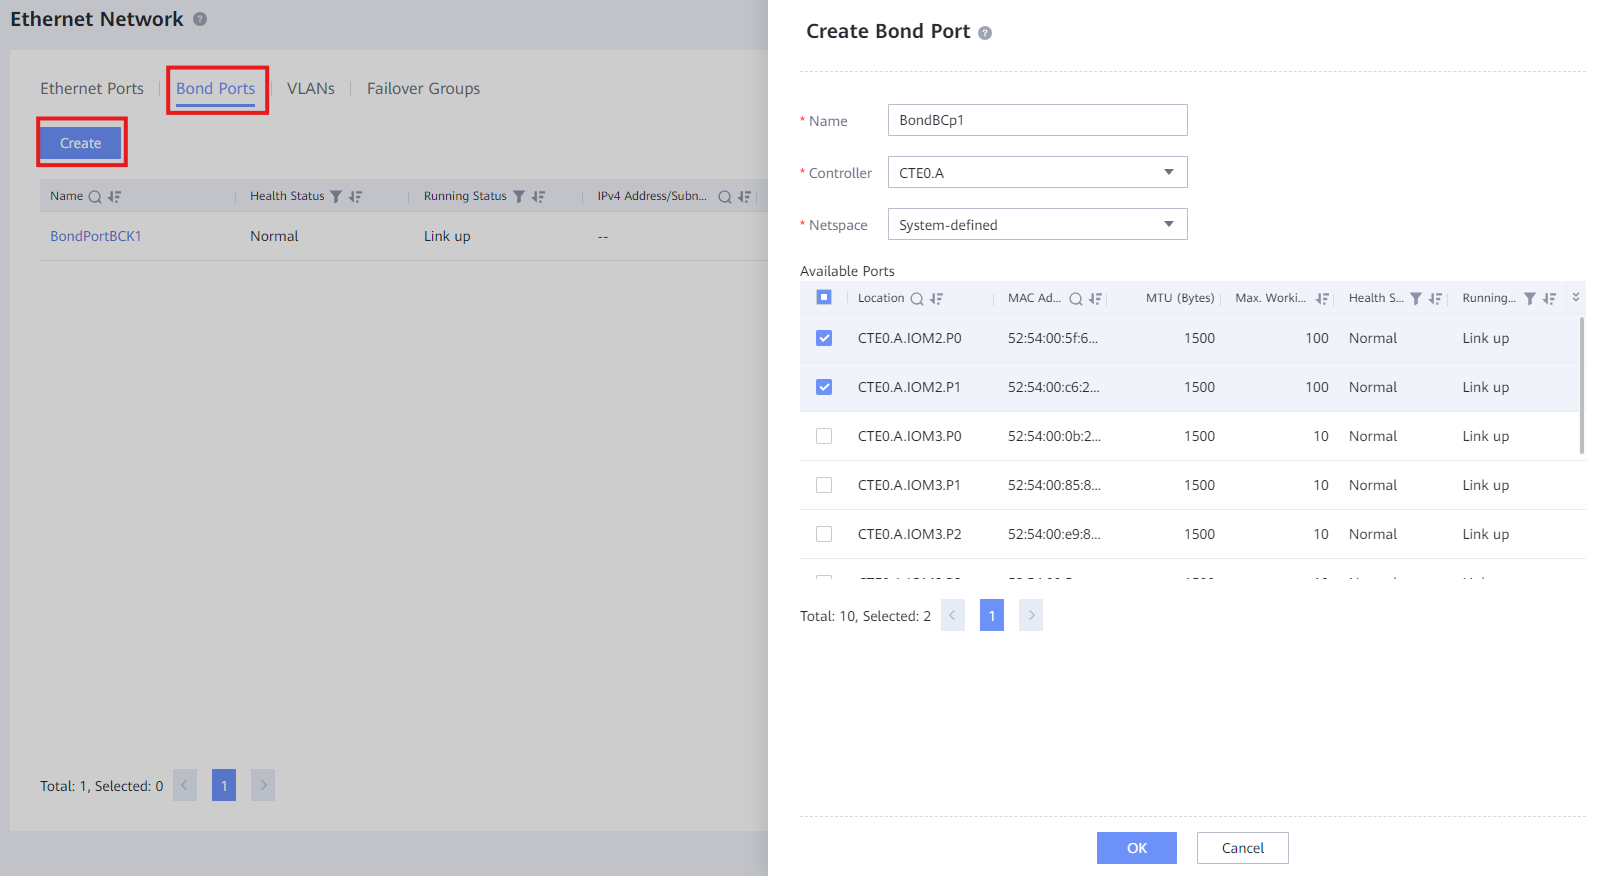 5. Click " OK " to create the Bond Port
6. Click " VLANs " and " Create " to fill the information:
5. Click " OK " to create the Bond Port
6. Click " VLANs " and " Create " to fill the information:
- Port Type : Select Bond port
- Home Port : Select the bond port created previously
- ID : Write ID of the VLAN and press " Add "
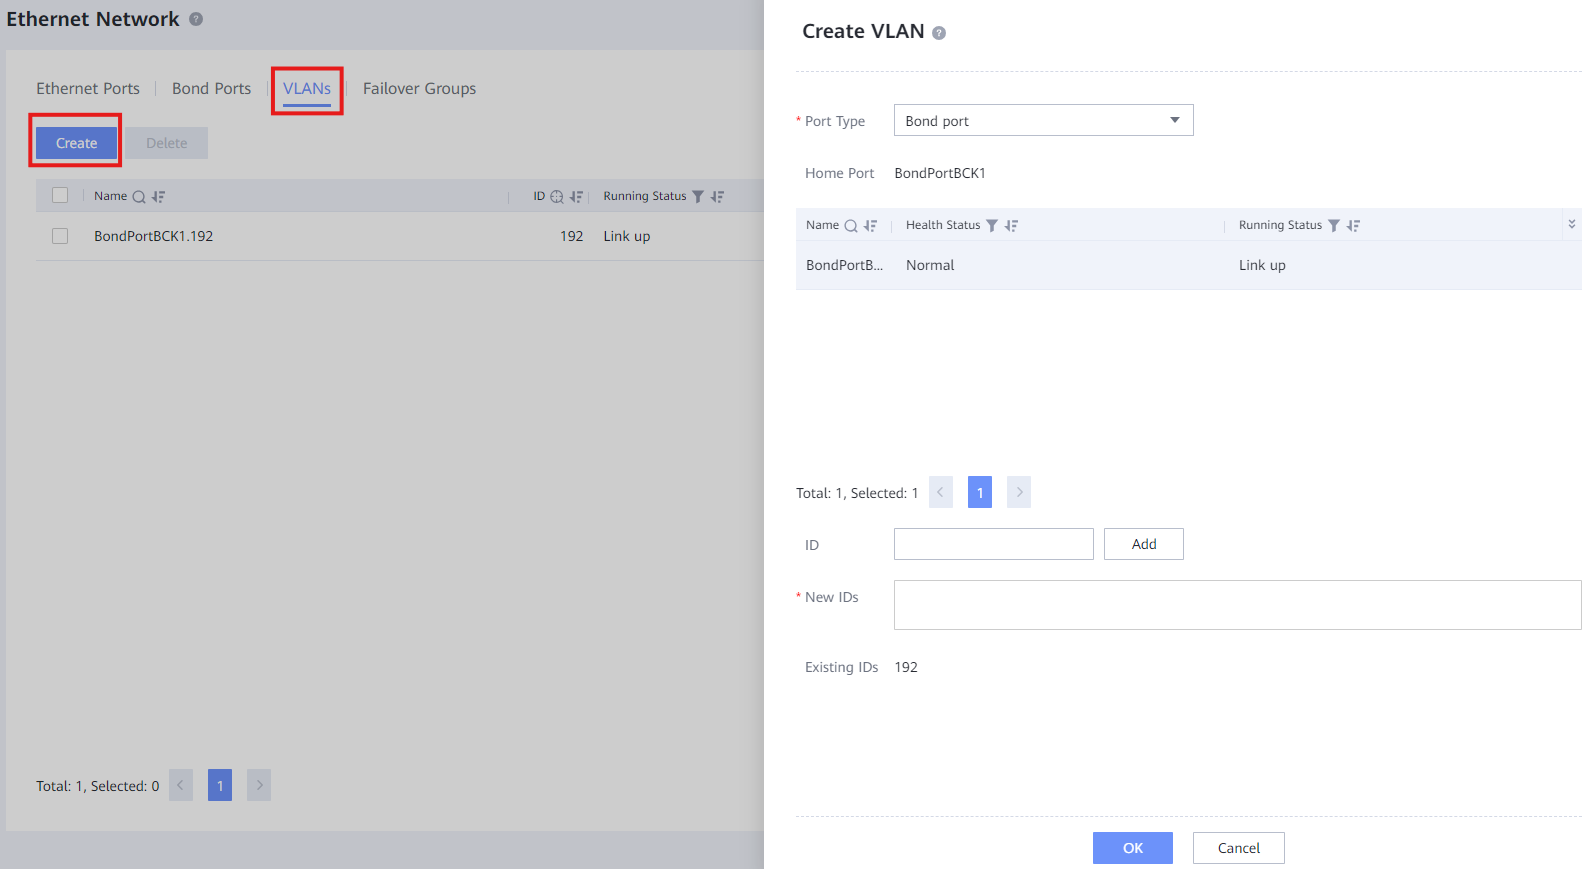 7. Click " OK " to create the VLAN with the Bond Port
8. Go to Network > Logical Ports
9. Click " Create " and fill out the information:
7. Click " OK " to create the VLAN with the Bond Port
8. Go to Network > Logical Ports
9. Click " Create " and fill out the information:
- Name : Descriptive name for the port (e.g. LP_DEV001)
- Role : Given by the client (commonly Service )
- Data Protocol : Given by the client (commonly NFS + CIFS )
- Owning vStore : Select the vStore created previously for the client
- IP Address Type : Either IPv4 or IPv6 (commonly IPv4 )
- IP Address : Given by the client (IP needed for service)
- Subnet Mask : Given by the client (commonly 255.255.255.0)
- Gateway : Given by the client
- Port Type : VLAN
- Home Port : Select the Home Port created previously
- Activation Status : Commonly left as Activated
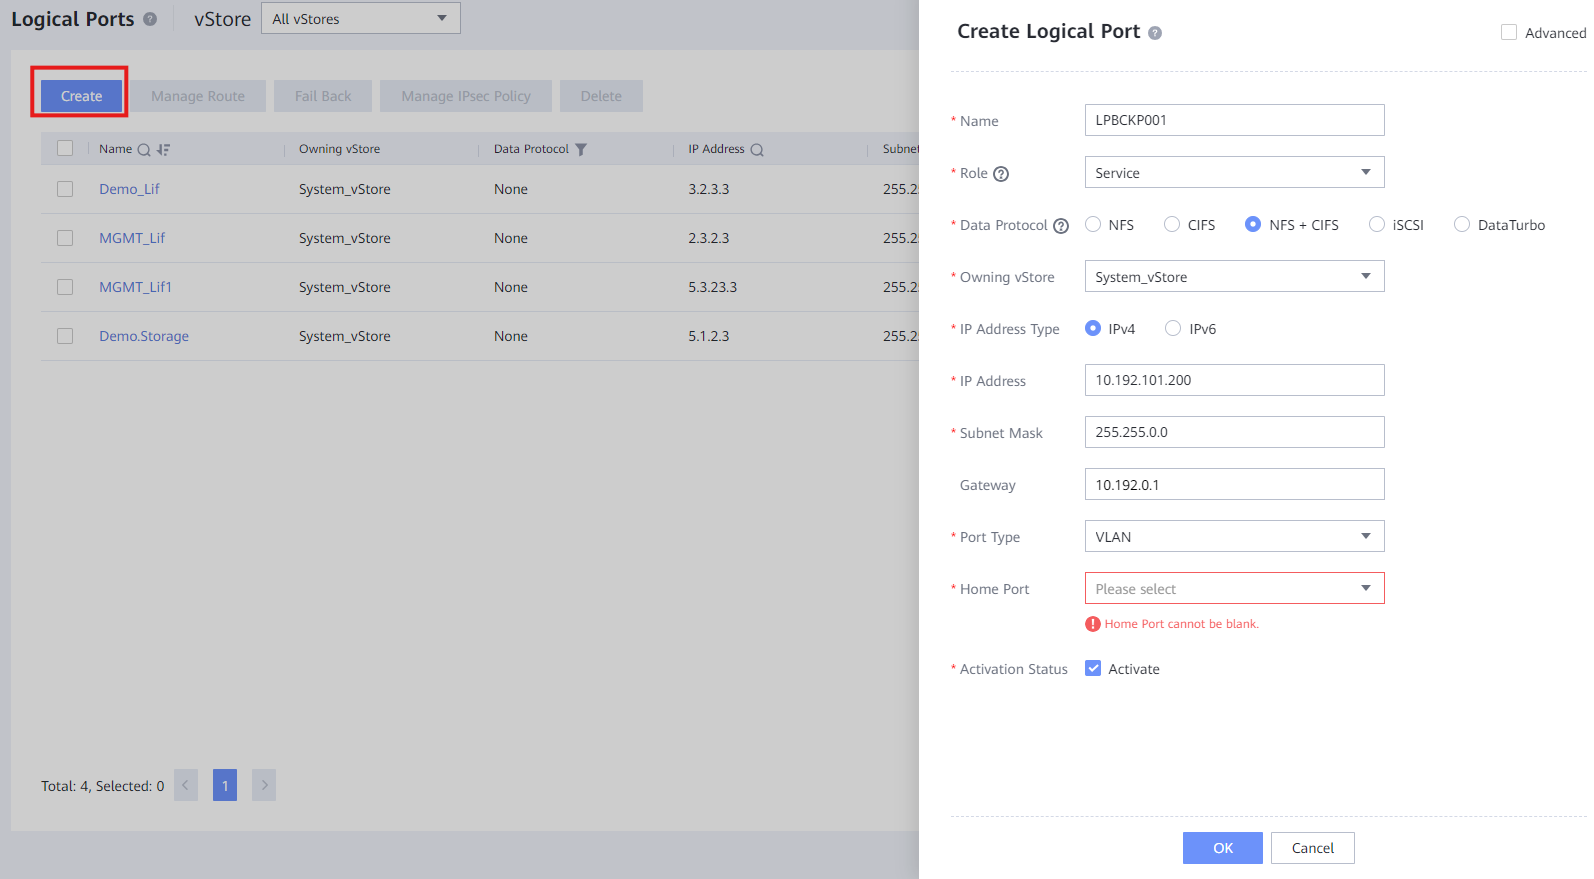 10. Click " OK " to create the Logical Port
11. Test the connection to the Logical Port through:
10. Click " OK " to create the Logical Port
11. Test the connection to the Logical Port through:
ping LogicalPort_IP